Showing posts with label tutorial. Show all posts

Thursday, March 21, 2013

Pinterest and Polyvore Promotion

I'd like to show folks HOW to utilize the various shopping and social networks available out there to maximize your visibility across the internet.......

And, this is assuming that you, dear reader, have NO experience with such things.  (Which is not true for many of you, but may be for some........)

NOTE==== you can click on ANY of the photos in this tutorial to blow them up if the writing is too small for you. :)

First up:  PINTEREST!!!!!!  
Other than being my very favorite site to use, Pinterest has a dedicated set of users, all pinning and re-pinning away.  You can set up your account, and then spend HOURS browsing and pinning to hundreds of boards that you organize according to what's in them.

For example--- I have my etsy items on various boards, but I also have a Yoga board, a gardening board, recipe boards, even a board dedicated to Bento lunches!

Here:  take a peek:
http://pinterest.com/rosemeister/

But, since we are working on promoting our Etsy shops, let me show you how to pin an item from your shop.  Etsy has a "pin-it" button on every item listing page--- let's use it!!!!!!!  (But first, did you create an account?  Do that first.)


This will open a window, where you choose which board you'd like to pin to, or you can create a NEW board right there in the pop-up.


The site is VERY user friendly.  Get to know it, organize your boards, follow your friends, and enjoy the promotion to your site each time someone repins your item, or clicks on that pin which will send them directly to your etsy store.

Here are GREAT articles discussing how to further your pinterest/etsy connection:
 http://handmadesuccess.com/2012/09/how-to-use-pinterest-to-drive-traffic-to-your-etsy-shop/

http://outright.com/blog/the-ultimate-guide-for-using-pinterest-for-your-etsy-shop/


Next : POLYVORE !!!!!!!!!!!!
Polyvore is a site where you can create "sets", basically collections of things set up as an outfit.  Now, if you sell anything you can wear--- clothing, accessories, jewelry, shoes--- Polyvore is an untapped wonderland of possible visits to your etsy shop.  It is a bit more work, and a little less user friendly than Pinterest, but you may find that is well worth your time to put together an "outfit" once a week.  I'm brand new to the site, so I don't know all the tips and tricks yet--- but I thought I'd share what I've learned so far:

First, create an account.  Then--- HERE is the secret ingredient to getting your item out there--- you'll need to install the "clipper" to your bookmarks toolbar.  Like this (Make sure that your bookmark toolbar is open by going to "options" and making sure the bookmark toolbar is checked) :

Now that you have that, all you need to do is click on that "clip to polyvore" from any listing in your shop.  Let's do a scarf, and then we'll make an outfit to match it. :)  Type in any tags you want shoppers to find when they are looking to make their own sets.


Voila!  Your item will now be saved in your profile, under "items".  Next, we need to "create a set".  This is the fun part.  Basically, you drag stuff over to your board to create an outfit using your item in the outfit.  You can always crop and change the background of the items as well - play with that.


Now I start searching for items already on Polyvore (or add more items from my friend's etsy shops to complete the outfit!), and drag those over too:


Bada bing!  Now your item is part of a collection.  More bang for your buck?  See that "pin it" button up there?  Do it!  :)

It does take a little bit of time to start this, like anything, you'll have to play around with it and get used to how the site works.  You'll be a pro in no time!  Read this article on the Etsy blog for more:
http://www.etsy.com/blog/news/2012/sharing-and-selling/


That's all I can type up for now, but I promise to cover StumbleUpon and Wanelo soon--- I need to play with it more before I can give you a good tutorial.  Now go-- Pin it!  Clip it!  Set it!  :)

Let me know if you have questions, and I'll be glad to accept requests on further tutorials! :)
♥Rose

Sunday, March 17, 2013

Upcycled Boot Tutorial

Okay, this can BARELY be called a tutorial........ but have you SEEN these boots yet??????

Boots for sale at LuxuryJones.com

I've really, really, really been wanting a pair....... but the price tag is a bit steep for me at the moment.

So, what do we do when we WANT something, but we're broke?

WE MAKE IT!!!!!!!

Hopefully, you've got a pair of old boots lying around.

1.  Now, the boots above from LuxuryJones are full length, slit down the back, and folded down.  THEN embellished.  I didn't have a pair of full length boots I was willing to sacrifice on a first attempt at this, but I DID have a pair of beat up old ankle boots I got at Goodwill last year for $3.  I also had a bunch of belts that *ahem* didn't quite fit anymore, due to.....well......pie.    I gathered all my "junk":
Ankle Boots, Lace Scarf, Buckles, belts, brooches and old jewelry.


2.  I played with everything.  There were some pretty ugly ones before I decided what I'd do.  I cut the lace scarf in half.  I chose a magenta belt for one boot, and a leather rope belt for the other.  I chose some brass jewelry (one for each boot), and a couple of brooches.  I even grabbed a charm from this etsy shop - it says "marches to the beat of her own drum".  (I thought that one a clever addition to the boots.)

3.  Once I decided on the "junk" that would be added to the boots, I had to decide on HOW to get it all on there.  The end choice?  HIGH temp hot glue.   I know, I know.  A woman and hot glue gun.  Watch out world.  I haven't worn these yet, so I don't know for sure that it will hold up, but I will edit this post if anything goes astray with an edit.  Promise. :)

....a.  First, I glued the scarf around the boot.  Since these were ankle boots to begin with, I didn't need to fold them or anything.  I just glued the half scarf how I wanted it draped all the way around the boot.
.....b.  I put the necklaces on.  Since I put the belts OVER the necklaces, and secured them down, they didn't need glue.
.....c.  Belts.  Glue on belt, belt on boot.  Like I said above, not much of a tutorial, eh? ;)
.......d.  brooches and charms.  I tied on the charm and secured the knot with glue, and pinned on the brooches.  I didn't commit to the brooches by securing them with glue, because I'm not sure I like them yet.  (like the Art Deco Rose?  I made it.)

and...................... voila!!!!!!!!!!!!!!


My very own hobo/boho boots.  I plan to wear these with a skirt I'm going to make sometime this week, of which I'll try to post a tutorial as well.  I want to make a brown corduroy circle skirt with a tied waistband.

I'd love to see your boots!!!!!!!!!  Link below, or just ask questions!

♥Rose

Friday, March 1, 2013

The Lazy Seamstress ::: Full Gathered Skirt Tutorial

Today is my birthday, and I wanted something new for myself.  What I really wanted was a heavy circle skirt made out of luscious material.  But I DO own a sewing machine, and I DON'T have a very large disposable income.........

So I made one.


Three things you should know about THIS seamstress.

1.  I am a lazy seamstress.  I don't like to sew fussy things.  I don't like to measure, let alone add interfacing, binding, zippers, and the like.  I CAN do those things, I just prefer not to.

2.  I don't "do" patterns.  Every time I do, I feel like I'm taking my physics finals all over again.  I start to get the shakes, sweat all over the fabric, and sew things inside out and backwards.  Without fail. Every. single. time.

3.  I don't "write" patterns either.  I fiddle around with something, fold it, twist it, and make something up on the spot.  I'm usually lucky if I can remember what I did the next day.  So, please excuse me if this tutorial sucks raw lemons.  I thought this was too easy to screw up, and hopefully I'm right! :)


Materials:
6 yards (or less if you want it less "full") of whatever fabric you have lying around.  I happened to have this lovely dupioni I've been hoarding for over a year.
Length of 3/4" elastic to match your waist.
OPTIONAL: ribbon trim for "waistband".  Whatever length your fabric is.  I highly recommend the trim, as it hides the "laziness" of your double duty casing/waistband.


There are only 3!! steps to this "Lazy women's skirt."  I figure it will make more sense if I tell the story in my pitiful mousepaint pictures than if I tried to over-explain it with inadequate wording.

You COULD french seam, add a "real" waistband, increase the casing size for wider elastic, add trim to the bottom, etc.  This is just a starting point. :)

***CLICK PHOTOS TO ENLARGE if you can't read them***


See?  It's easy. It took me ten minutes.  If you have questions, don't be shy!  Now I just need a gold tank to go with this, and some new shoes.  Man, how I wish I could just make THOSE.  Imagine..... making your own shoes.  I'd never leave the house.

♥Rose

Thursday, August 23, 2012

A Wednesday Tutorial - Your first sewing project!

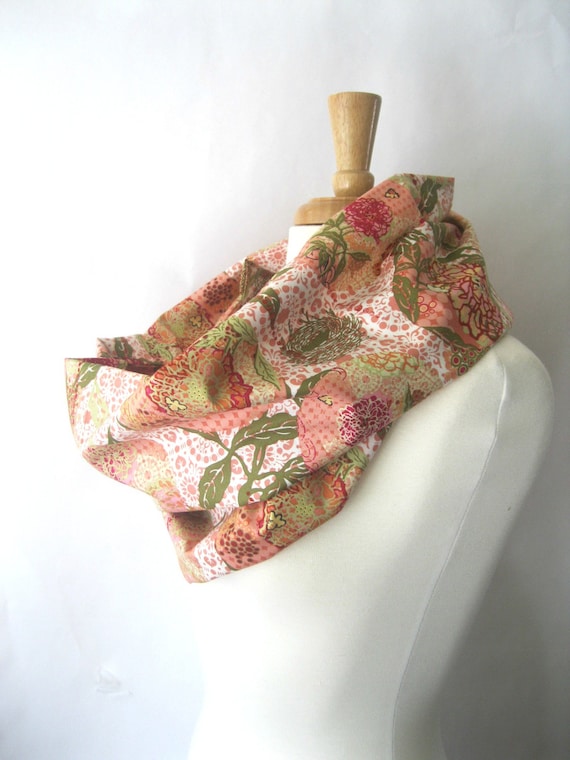
Okay, so everyone needs a circle scarf!!  How about you *gasp* sew your own?????  If you have a sewing machine lying around, it's time to use it!!!  Really.  You don't have to cut anything.  You're going to sew 2 straight lines, and be DONE.

What you'll end up with?


What you'll need:
1 yard of fabric - for this project, I've used quilting weight cotton in a fun print!
A sewing machine - see instructions for how to thread that thing!

So, here goes.

Step 1:  Iron fabric.  Unless you want it to be wrinkly.  (I don't)
Step 2: Fold fabric in half the long way-- your goal is to have a longer piece.  Fold it both ways, and see which way is longer.  MAKE SURE THE RIGHT SIDE IS FACING EACHOTHER.

Like this:


Step 3:  Sew along the raw edges of the fabric -- keep that sewing foot the same distance from the edge of the fabric at all times, and you'll have a straight long line, and an inside out tube.

Like this:


Step 4:Turn the long tube right side out.  Iron again.
Step 5: Fold in one end of the tube about 1/2", and iron that edge.

Like this:


Step 6: Tuck the other raw edge of the tube INSIDE the folded edge, about 1/2 - 1" of fabric.  For this type of circle scarf, I don't "twist" the fabric, but you are welcome to do so!  Pin the tucked fabric inside the folded end.

Like this:


Step 7:  Sew a straight line across the tucked edge.  You are DONE.

In 10-15 minutes max, you've sewn your very first fashion accessory!!!!!!!


Now, if you're feeling fun, start sewing things onto the fabric before you sew the tube, and you'll have embellished scarves!


Have fun!!!
♥Rose

Wednesday, August 8, 2012

A Wednesday Tutorial: SEO and your Etsy Shop.

So, I am constantly struggling with keeping my "SEO", or search engine optimization current.  As trends change, so too must I make sure that my accessories change with the times. 

Am I a snood?  A cowl?  An infinity scarf? Help!  I'm confused!


One example is "snood".  What the heck is a snood????? Well.......that's difficult to explain.  A snood USED to mean a head covering--- think of those giant crochet hairnet-type things.  Now, a cowl is a snood.  A cowl is an infinity scarf.  An infinity scarf is a circle scarf.  Confused yet?  Me too.  But since I carry so many of these types of designs in my shop--- I MUST figure out how to get buyers in there!   And even more importantly--- the "Snood" is being hyped as the "it" accessory for fall.  Do I change with the times?  Heck YA I do!

Enter SEO.  You want to figure out who is searching for what.  You want to know at what rate people are searching.  You want to know exactly how to describe your listings.  SEO <------an acronym for a fancy term that means "get people to see my shop when they search."  Now, I am by NO MEANS an expert.  But I have learned a few handy tricks, and I'd love to share them with you!

First trick:  RESEARCH.  If you're offering a product, you better hope people WANT your product.  The way I keep current is by checking out fashion accessories trends once a week.  Sometimes it's the same for weeks, but more often than not-- new ideas for "what's hot" come out every few minutes.

Second trick: GOOGLE ADWORDS KEYWORD TOOL.  This will help you choose your title for maximum search hits from google.
1.  You'll need a google account for this.  They are free, so if you don't already have one, sign up.
2.  Go to the Google Adwords site.Open the "Keyword Tool" Under the "Tools and Analysis" tab:

You can click on this to expand the photo....

3.  Enter "comparative search terms" in the box.  You can list as many as you like.  I'll try out some terms for this item from Rotifera:

Hair Comb-- WHAT are folks typing in that search bar?
Type in whatever you THINK people might type in to search for your item.  One search term per line.  Click "SEARCH"
4.  Now--- you'll find search terms listed below.  The tool will tell you the relative competativeness between you and other sellers if you choose that term.  It will tell you how many searches are being performed for which terms.  I like to shoot somewhere between 100 and 1500 searches.  Now, this is where the guesswork comes in.  You want to be in a category with alot of searches... but not so many that you'll be outcompeted by 10,000's of other items.  You want to use a term with a lower level of competition, if possible.  The "ideal" is to have a "low" competition, but a 100-1500 searches.  That seems to be the golden  mean for me and receiving hits from google.

Here are my results.......  which would YOU choose?


Well.........  I can't rightly choose "bridal", "flowers", "rhinestone", or "crystal" or "feather".  That leaves me with "plastic" or "decorative".  I see that they ALL have a high level of competition.  But they also have a great number within my golden mean..... so I would choose the one that best fits my item.  I think I'll go with "Decorative Hair Comb". 

5.  You can then click on the term you like, and do a google search using those terms.  You can click on "insight" to see data about the search term.  Play with it. 

6.  Now--- you've entered your product, and found what you believe to be the perfect term.  You change your title.......and wait.  This is the hard part.  You have to check your stats.  You have to determine if you've made the right gamble.  Sometimes you win BIG, and sometimes you lose.  For example, I've found that "hair accessories" is my top search term for anything in the Rotifera shop.  So I usually include that in the title, if not the first three words.  But THOSE FIRST THREE WORDS are the MOST important.

Now--- this is JUST an introduction into the mysterious world of SEO.  Your categories, shop announcement, and descriptions and tags all come into play too.  But I find that one change at a time is the best way to go, and this is the change that I find I get the most "bang for my buck", as far as time is concerned.  Once you've nailed this part, explore more about SEO online.  There are a plentitude of websites to search and learn... Here are just a few!

1.  Etsy Article: http://www.etsy.com/help/article/247
2.  Biz Ladies: http://www.designsponge.com/2010/06/biz-ladies-understanding-search-engine-optimization.html
3.  Impossibly Alice: http://impossiblyalice.wordpress.com/2011/03/28/beginner-etsy-seo-backlinks/

So!  Best of luck!!!  Now Go!  Go!  Improve your SEO!  *shakes pompoms*
-Rose

Monday, July 30, 2012

Make an Etsy Banner using PicMonkey.com!!

I like to make my own banners for my etsy shops..... and thought I'd post a tutorial on how to do so--- it's VERY easy!!!

So, you can start out with a picture of a listing from your shop, and end up with something like this:


OR, you can start with a blank palette, and end up with something like this:


I'll show you how to begin--- You'll need mousepaint, and access the picmonkey website.  (100% free)

1. Open a photo in mousepaint.  (for the blank option, you won't need to-- just open paint.)
Your photo will be too large.  You'll have to shrink it using the "stretch-skew" option under "image".  I like to start at about 24% of my original listing size.  Your goal is to get it to 100 pixels in height.  You can always click "undo" under edit to start over if your guess isn't right.  

Step 1: Using Stretch/Skew to get the photo down to size for a banner (100)


If your stretch/skew doesn't get it there, you can shorten it using the mouse and clicking on the box around the image and dragging it to the correct height of 100 pixels:


Step 1: Stretching using mouse drag.


2.  Next, you want to use the mouse again--- drag the width to 750 pixels.  Be aware that you are also correcting height when you do this.  Get as close as you can to 750 pixels--- that is the recommended etsy size!  Your banner should look like this:

Step 2: Stretching to the correct width of 750 pixels using mouse drag.

3.  Save this image--- this is the photo you'll upload to picmonkey.com.


4.  Open Pickmonkey and upload your new blank banner.....You'll choose "Edit a Photo" from the left side of the screen, choose your saved photo of a blank banner, and it will open for editing:

Step 4: Opening saved photo under the "edit" option in picmonkey.

5.  Add text to your banner!  Choose the "P" on the left hand side, and enter the text you'd like.  You can try out different fonts too!  Click "ADD" once you've typed it in.  It won't fit at first--- you'll have to drag the mouse to make the text fit, and choose the color you'd like the text to be.

Step 5: Adding text to the banner in picmonkey.


6.  Once you've added one text box, you can add another, if you like! 

Step 6:  Adding more text.  You can center and move the text around by grabbing the whole box with the mouse!

7.  Optional::: Want a colored background for the banner instead of white?  Choose the "overlay" option (they look like little stickers).  Add a rectangle, and choose the color you'd like the background to be:

Step 7: Add a colored rectangle overlay.


Now--- using the mouse, stretch that box to cover all your text, and right-click on it.  Click "send to back". 

Step 7: Adding the colored rectangle to the background.

You should end up with something like this.  You can always change the color, position, or just click undo to remove that sucker!

Step 7: Your colored box in the background.

8.  Now, you can save here, or explore the site to add stickers, effects, and other fun stuff.  Explore those options, and have fun with it!!!!!!  Don't forget to save as a jpg file!

Here are a few banners I've made this week.....You can make them for special occasions, sales, anything!


Have questions?  Post them here!  I hope I've been helpful in spiffing up your etsy shop!

♥Rose

Tuesday, July 17, 2012

Finding Balance...

So, you all know that being home full time for etsy is new to me.  The only problem I've found, so far *crosses fingers*, is finding time to work on projects for etsy!!!!!!!!!!!!!!!!

Who knew. 

Now that I'm home full time, I seem to find more and more cleaning that I have time to do, more home improvement projects I've been putting off, and more time to rollerblade. <------oh yes.  People still do that.  (okay.  I still do that.)  Also, I may have started watching seasons 1-6 of How I Met Your Mother.  That counts as serious work, right?

So, over the past week, I have: gutted, decluttered and reorganized both my bedroom --2005 wanted her clothes back, my laundry room (HELLO JUNK.  Six trash bags full of junk.), and my kitchen.  All of my craft supplies are organized, I bought a new vacuum......

Do you see how this has been going?  So, last night I decided that I would SIT and sew.  I would not find a reason to get up, unless it was from the cutting desk to the sewing machine.

And?  The result?

I got my sewing mojo back!!!!!!!!!!!!

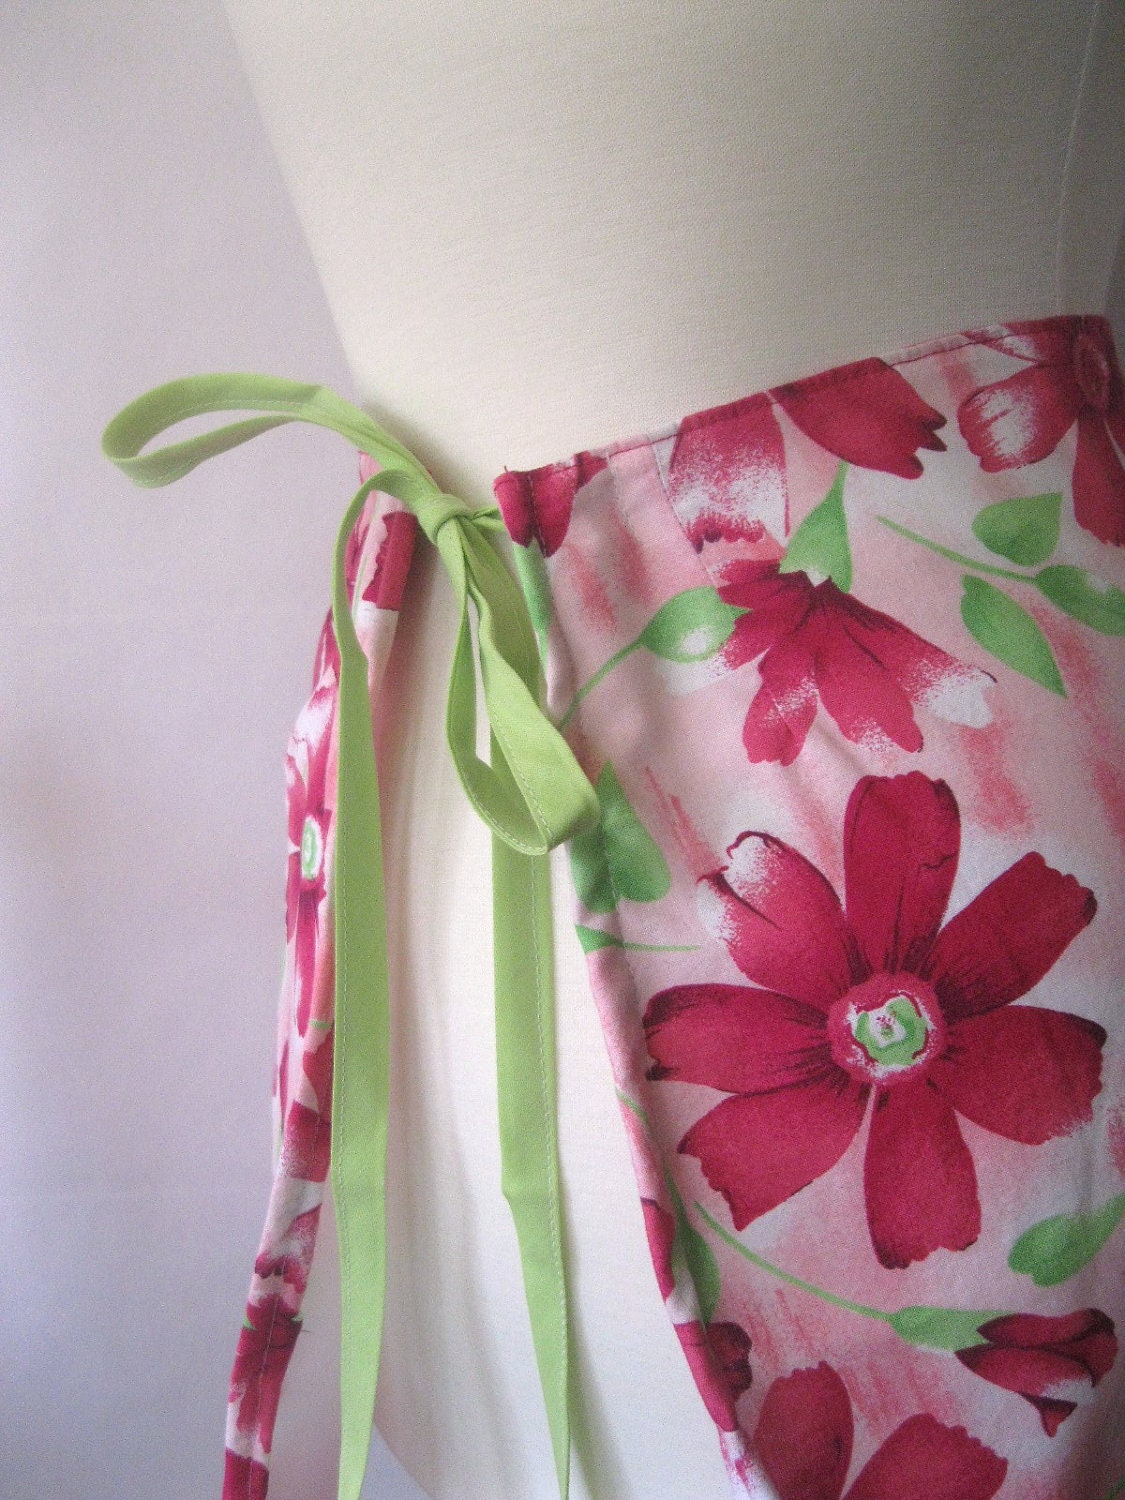
Here are two "skirprons" I upcycled last night:


Mini Tutorial:::::::::
1.  Find a cotton skirt that you don't wear, for whatever reason.
2.  Using a seam ripper, remove the back seam and zipper (if there is one.)
3.  Double fold in the back ripped seams: iron, pin and sew.
4.  Cut a package of bias tape in 1/2, and sew both sets of raw edges under, and down the length of the tape.
5.  Add each "strap" made of bias tape to the back side of the apron!

VOILA!!!!!  The "skirpron".   *enter voiceover*  "Also available on SewEcological.etsy.com"  */voiceover*

Soooooooo... Now that I've got my mojo back, I plan on making a few more aprons, and a TON of unfinished armwarmers I've got laying around.  If I can avoid cleaning out the kitchen cabinets, repainting the kitchen and my bedroom, and totally reorganizing my amazing DVD collection.

May the force be with me.

♥Rose